What is continuous integration?
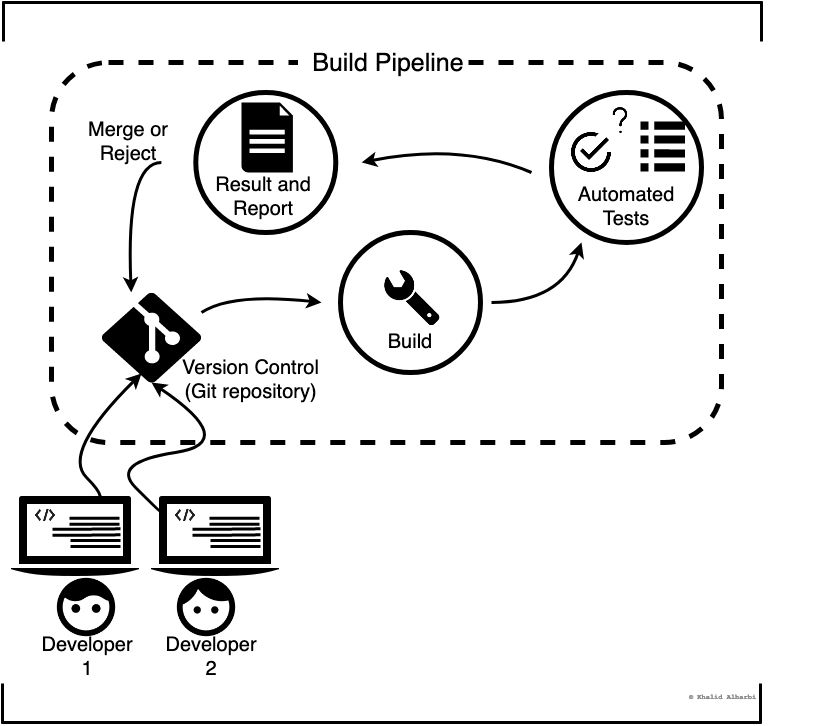
Continuous integration (CI) is the practice of automating the integration of changes from multiple contributors into a central repository. When new code gets checked in by a developer, it will go through the CI pipeline before it gets integrated into the central repository. The CI pipeline may include running automated tests, test coverage, code style checkers, quality tests, review tools, and more. The CI will make sure that the pipeline is successful prior to merging the new changes to the central repository. If the pipeline has failed at any stage, the changes are rejected and will be reported to the team, so these changes do not make it to the central repository or main branch in the version control system (e.g., git). With CI, every developer in the team commits daily and pushes to the central repository, each commit triggers the CI pipeline to run automated tests and builds. When the pipeline is unsuccessful, errors are reported immediately, so developers can have a high level of observability and confidence in resolving these errors.
CI is an effective agile strategy and a powerful tool that enables teams to develop software rapidly with faster releases without sacrificing quality. Teams use CI to ensure that software is built successfully with safeguards from new regressions or unexpected failures.
Examples of CI services and servers?
There are many Continuous Integration (CI) services out there that run as a Software-as-a-Service (SaaS). Examples of such CI services include Travis CI, CircleCI, and GitHub Actions. You can also host your own CI server on a virtual private server of your own when using an open source automation server such as Jenkins, Agola, and GoCD.
Create a CI pipeline using CircleCI
CircleCI is a modern and powerful CI tool that is easy to setup and configure. It features a free plan that’s good for learning and small projects.
Requirements
- GitHub account.
- CircleCI account.
- A repository hosted on GitHub. I’m using a simple maven project for a Java application
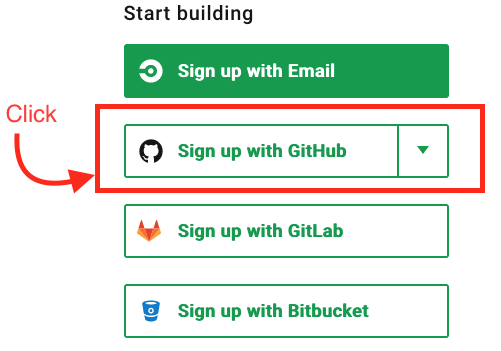
1. Sign up for a free account on CircleCI with github
Go to circleci.com and sign up for an account with your GitHub account.

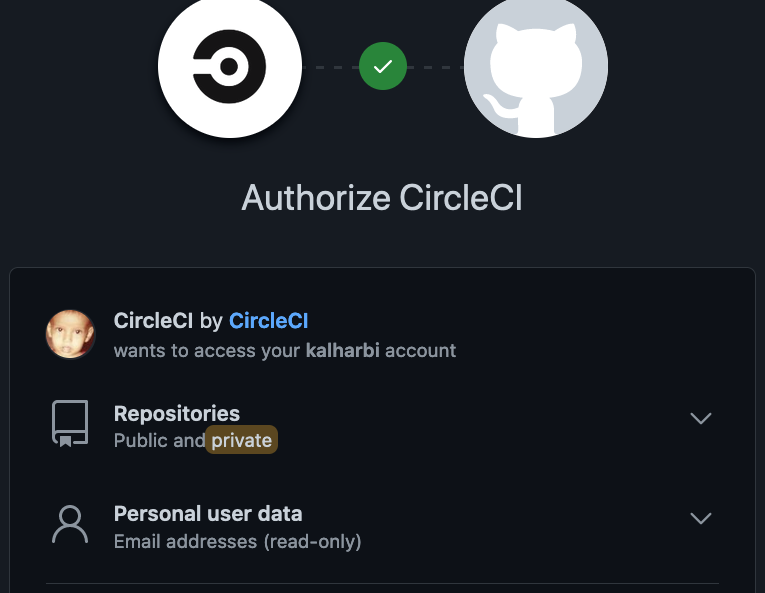
Authorize Circleci to access your repositories on GitHub.

2. Choose or create a new project
Next, we’ll need an app to run our CI pipeline (build, test, and deploy). You can use any project you like. I’ve created a simple Java app with Maven and added Junit tests. You can easily create an new Maven project in IntelliJ IDEA by doing the following:
- Go to File -> New -> Project
- Create a Java project with maven using the archetype generator
maven-archetype-quickstart, which generates a sample Maven project: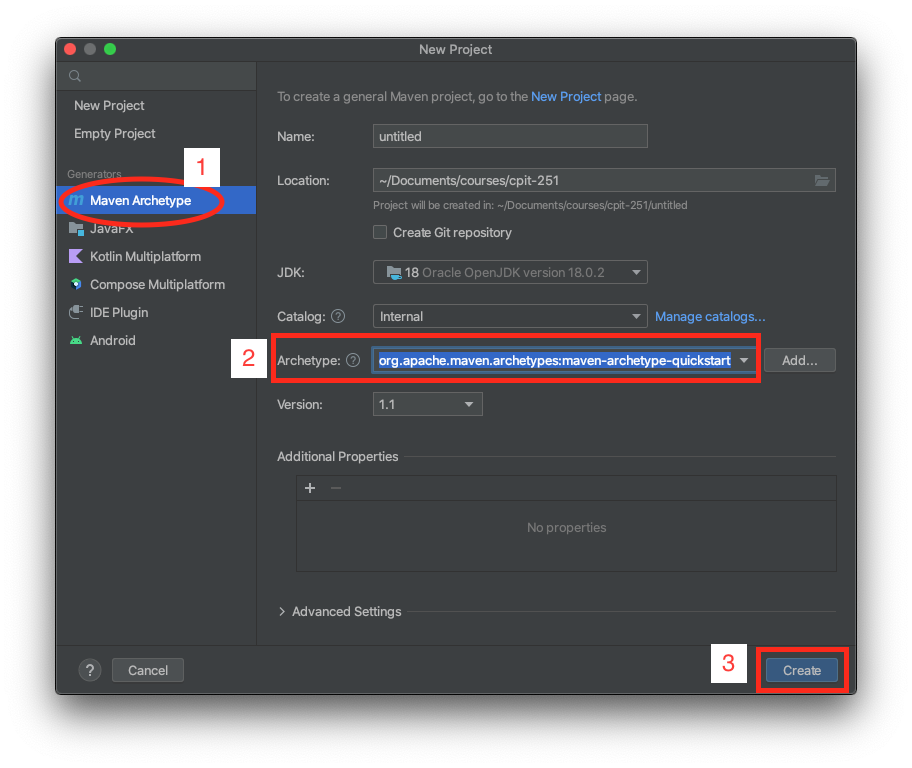
- Next, add unit tests as discussed in a previous lecture note.
3. Integrate your project with CircleCI
From the CircleCI dashboard, go to the Projects section, choose your GitHub repository, and click “Set Up Project”.

4. Configure the CI pipeline
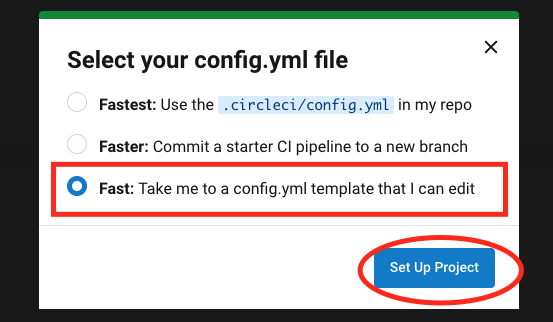
CircleCI requires a configuration file to be stored at a hidden directory under the root project directory. This configuration file is written in YAML and stored at .circelci/config.yml. You will be asked to create one, use an existing one, or start from a template. Select the last option, to start from a config.yml template as shown below.
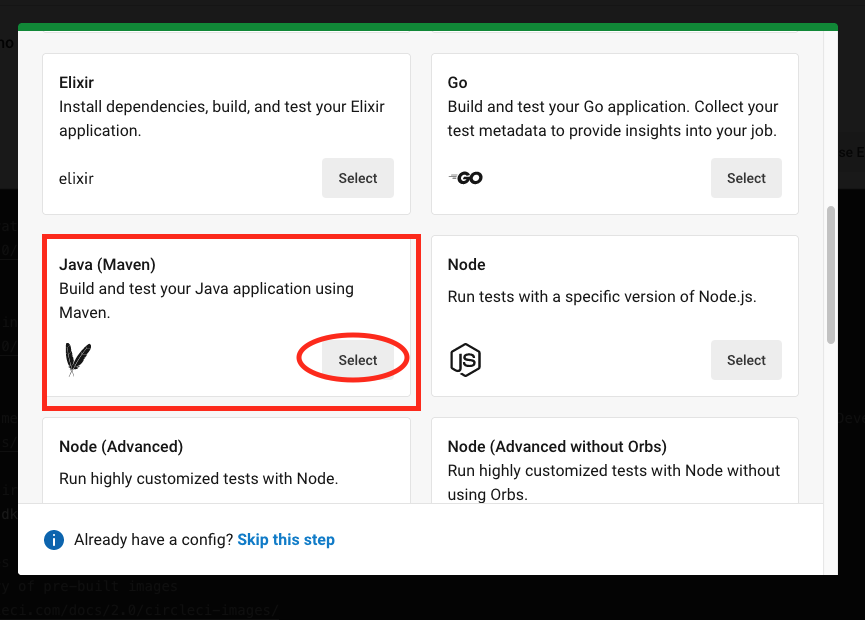
You will see a list of templates to choose from, select Java (Maven) since our java app is built with maven.
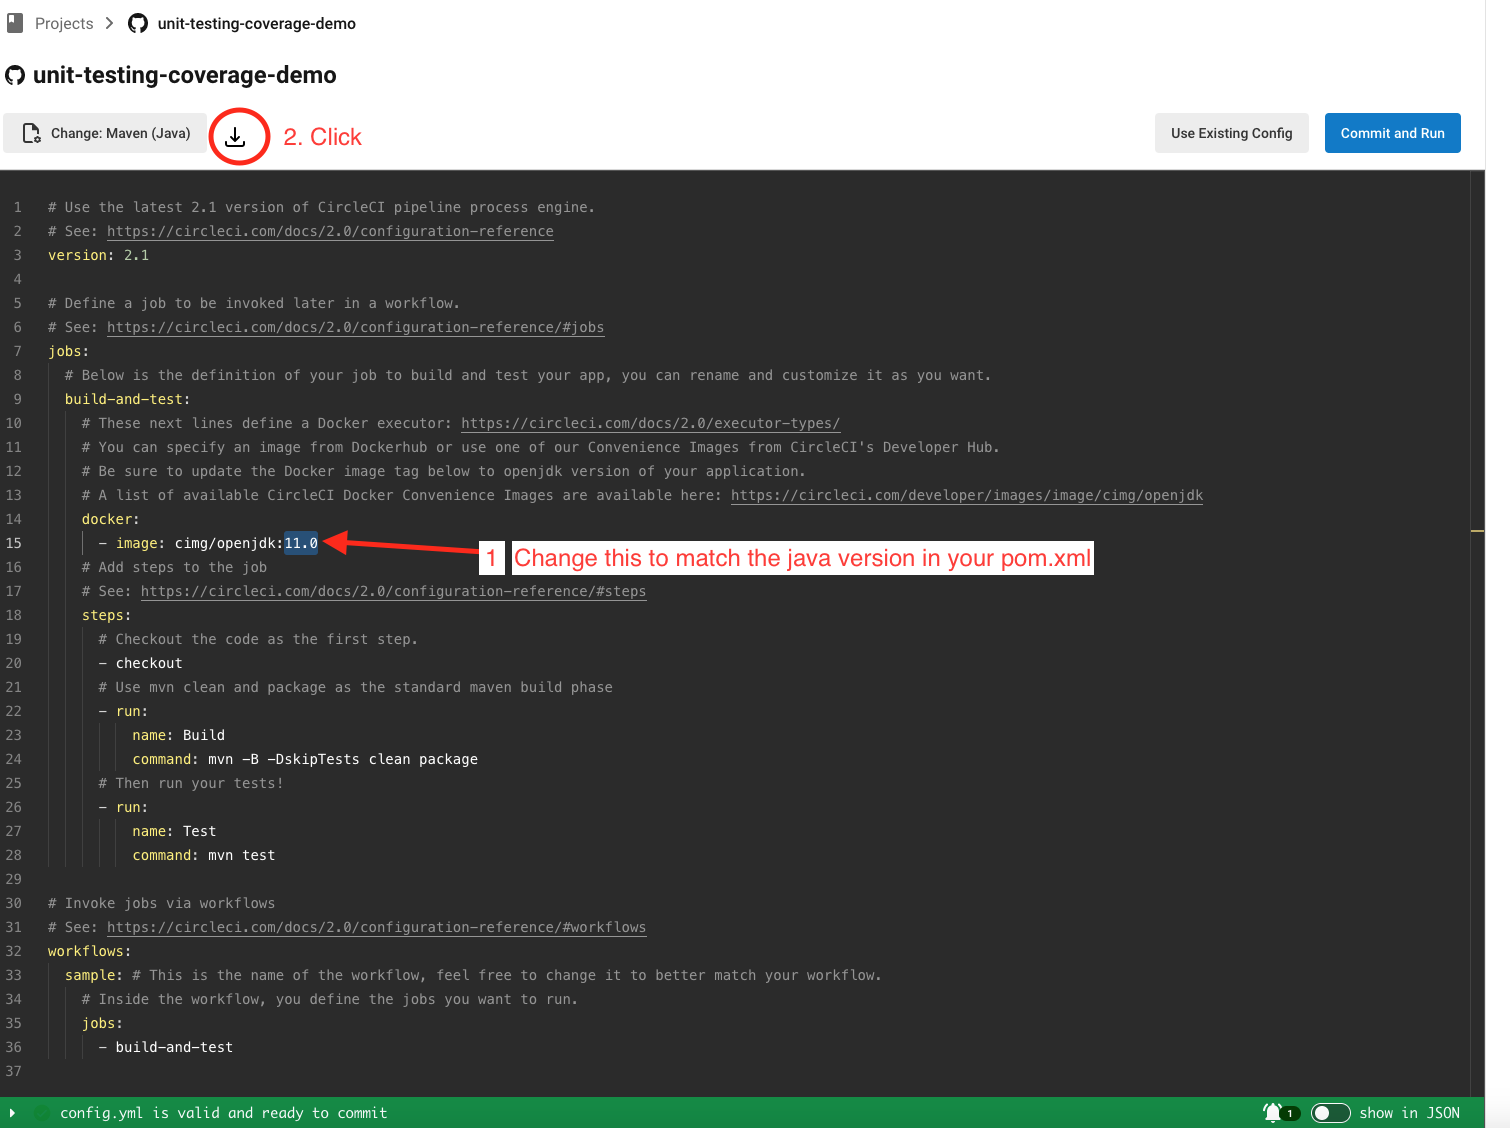
In the template file, find the line that starts with docker. We need to change the docker image that will be used to run our CI pipeline to match the version that our project is targeting as defined in the pom.xml file. I will change it to 18.0 to match our pom.xml in the sample project. Click download to download the template config file.
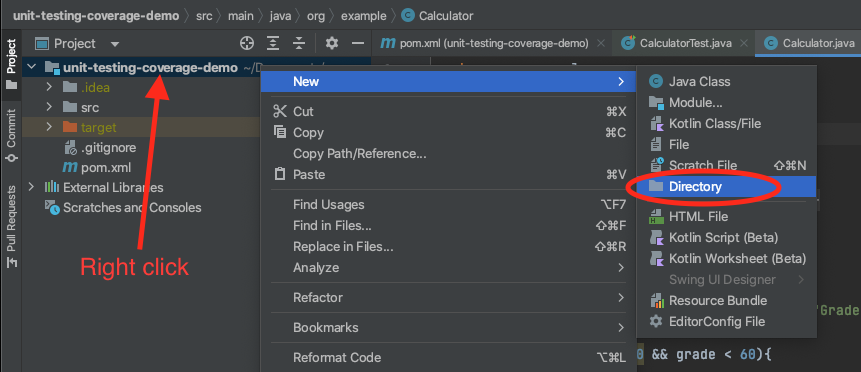
Next, create a directory/folder named .circleci under your project root directory (next to the pm.xml file) and place the config.yml file inside it.
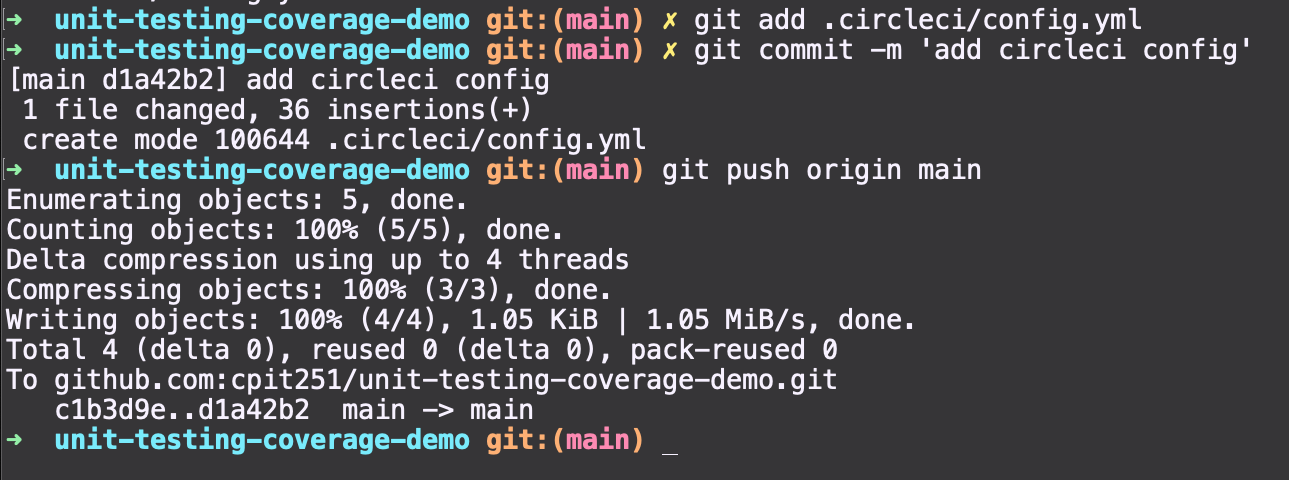
Now we are ready to add this config file to our git repository. Commit the changes and push them to GitHub.
git add .circleci/config.yml
git commit -m 'add circleci config'
git push origin main
CircleCI will create a build-and-test pipeline that is triggered any time we commit new changes to our repo on GitHub. Wait for the pipeline to kick in and succeed as shown below.
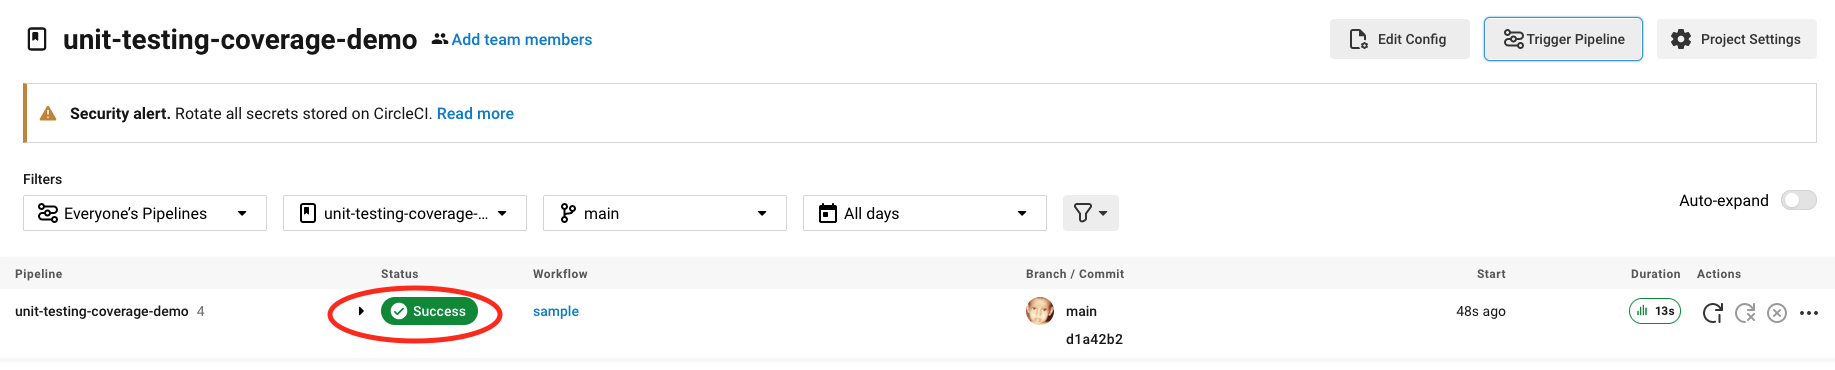
Congratulations 🎉, your pipeline is successful and green. If you do not see a green pipeline, then check the errors in either the config file or your project (depending on what error message you get). If the pipeline is green, then we can keep working on pur project and continue to make changes with confidence since the CI pipeline is passing.
Note that sometimes we like to make changes in a different branch other than the main branch, so if that was the case then we can merge that branch into the main branch once the pipeline is passing.
Adding Status Badges
Finally, we wanted to add a badge that shows the build status (passed or failed) in the README file, so team members can quickly see build statuses in the repo’s landing page on GitHub.
To create a badge, you need the following information: To generate your own status badge, you will need to know, and substitute, the following variables in the code snippets below:
- <PROJECT_NAME> The name of the repo on GitHub. Example:
unit-testing-coverage-demo - <ORG_NAME> The organization or user name the project’s repo belongs to. Example
cpit251is the owner of our sample project on GitHub. - The version control system provider (gh for “github”)
- [Optional] An API token is required for private repos.
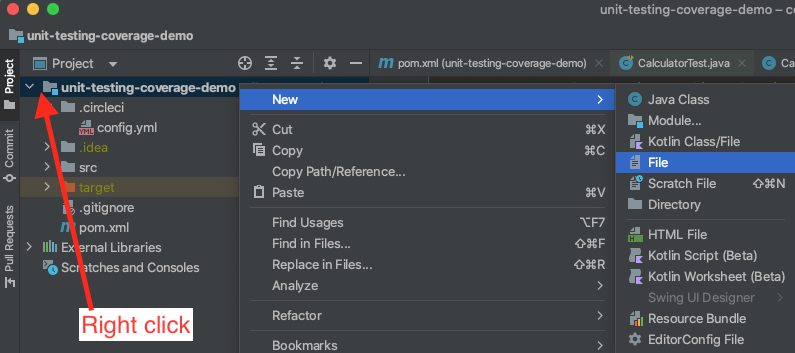
Before we create a badge, we wanted to add a README.md file to our project. create a new file named README.md.
Next, add the following markdown code to the README.md file after replacing the values between <> with the values that match your repo:
[](<LINK>)
If your repo is private, then add the following code after replacing the values between <> with the values that match your repo:
[](<LINK>)
For the public sample project used here, I have added the following markdown code:
## Unit Testing and Coverage Example
[](https://app.circleci.com/pipelines/github/cpit251/unit-testing-coverage-demo)
This should be rendered as shown below:

Generating Code Coverage Reports
As discussed in the previous lecture note on unit testing and coverage, there are several services that can read coverage reports, calculate the coverage percentage, and generate a badge that you can place in your README file of your project. Examples of popular code coverage services are coveralls.io and codecov. These services can show you which parts of your code aren’t covered by your test suite. We are going to see how to generate code coverage using codecov for a java project.
We will generate a coverage report using a maven plugin called jacoco-maven-plugin, which uses a line code coverage library called JaCoCo that generates code coverage report. This plugin will execute the JaCoCo report goal during the Maven test phase (i.e., when running mvn test). We will use this report and upload it to Codecov as a part of our CI workflow.
Setup
Open the pom.xml file and add the jacoco-maven-plugin under <build></plugins>:
<plugin>
  <groupId>org.jacoco</groupId>
  <artifactId>jacoco-maven-plugin</artifactId>
  <version>0.8.8</version>
  <executions>
    <execution>
      <id>prepare-agent</id>
      <goals>
        <goal>prepare-agent</goal>
      </goals>
    </execution>
    <!-- report is attached to Maven test phase -->
    <execution>
      <id>report</id>
      <phase>test</phase>
      <goals>
        <goal>report</goal>
      </goals>
    </execution>
  </executions>
</plugin>
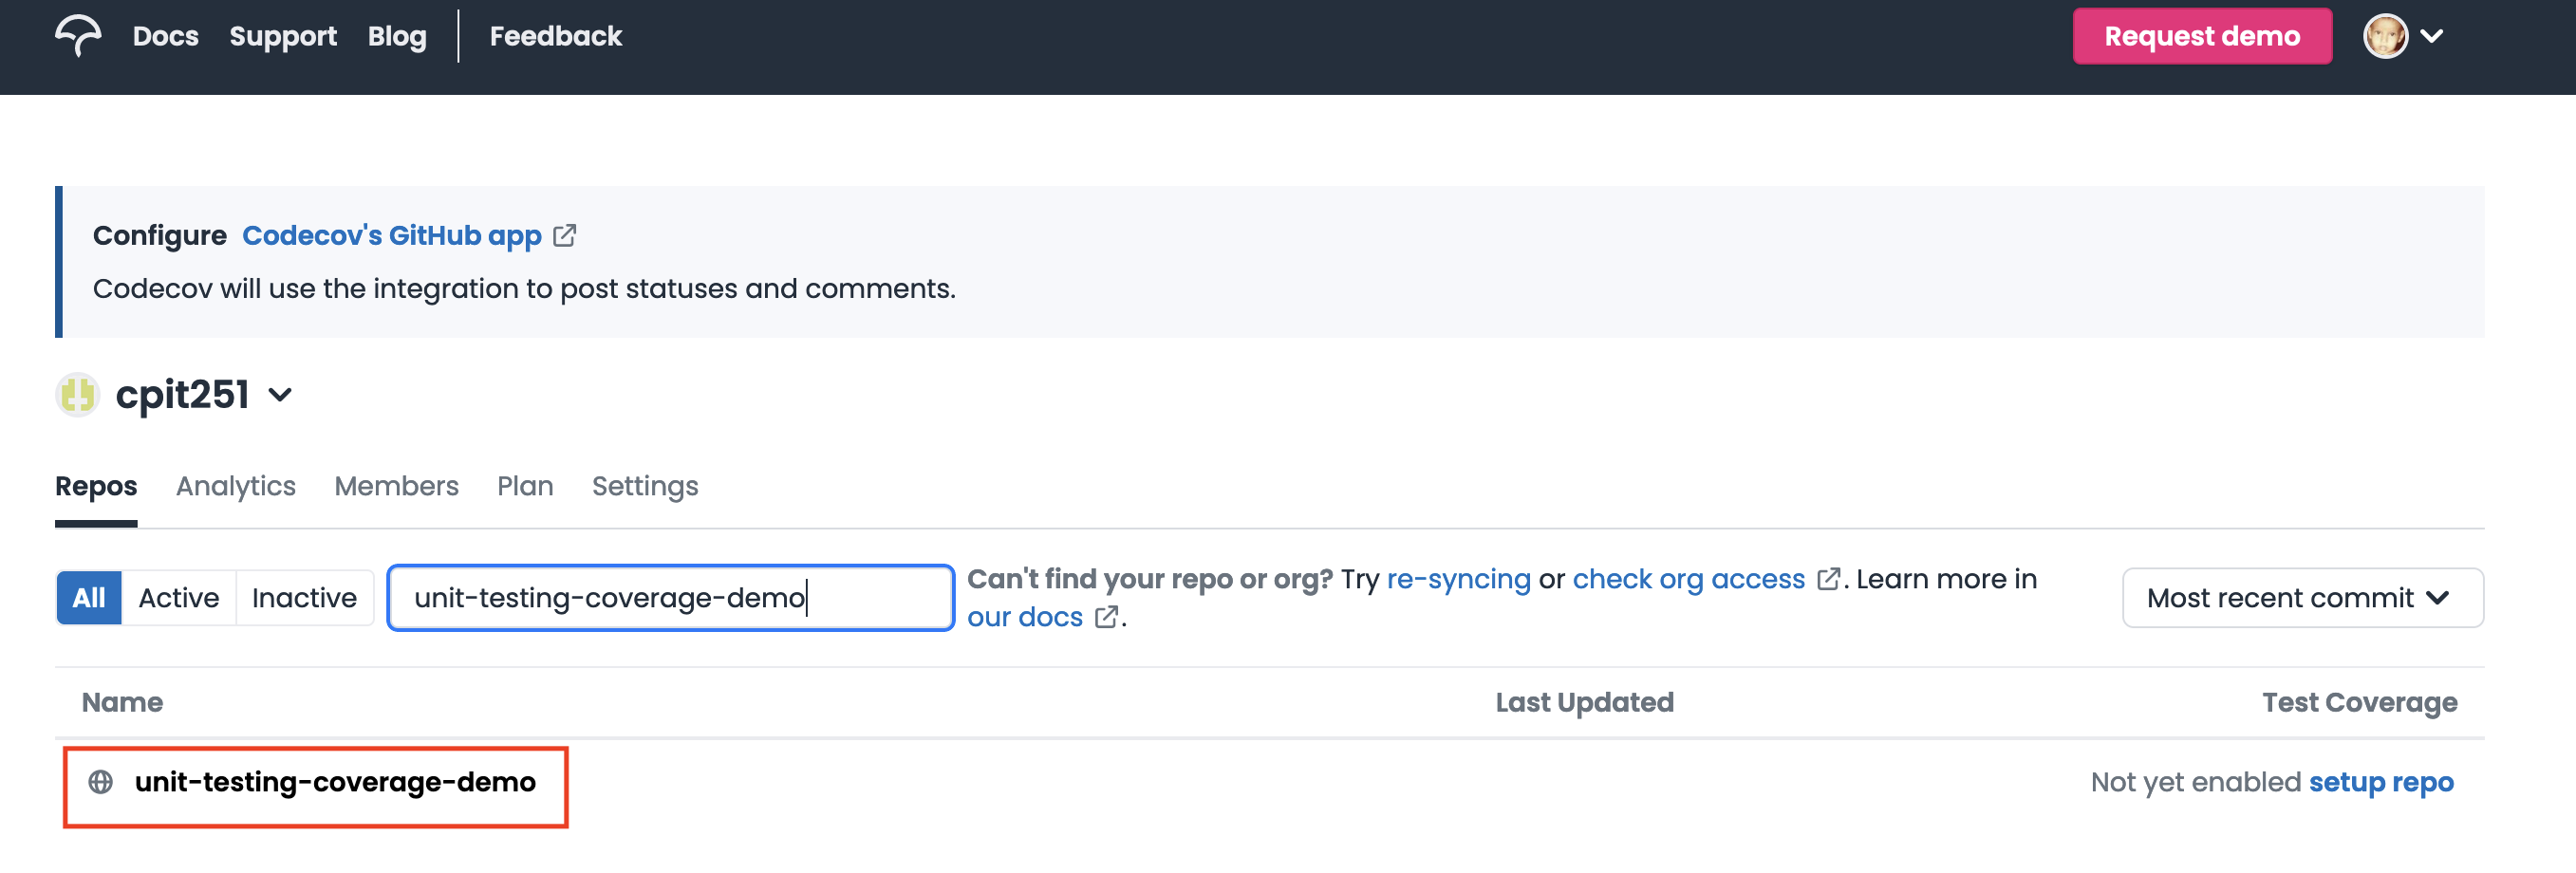
Commit your code and push it to GitHub. Login on codecov with your GitHub account.
Select your project from the list of GitHub projects you own:
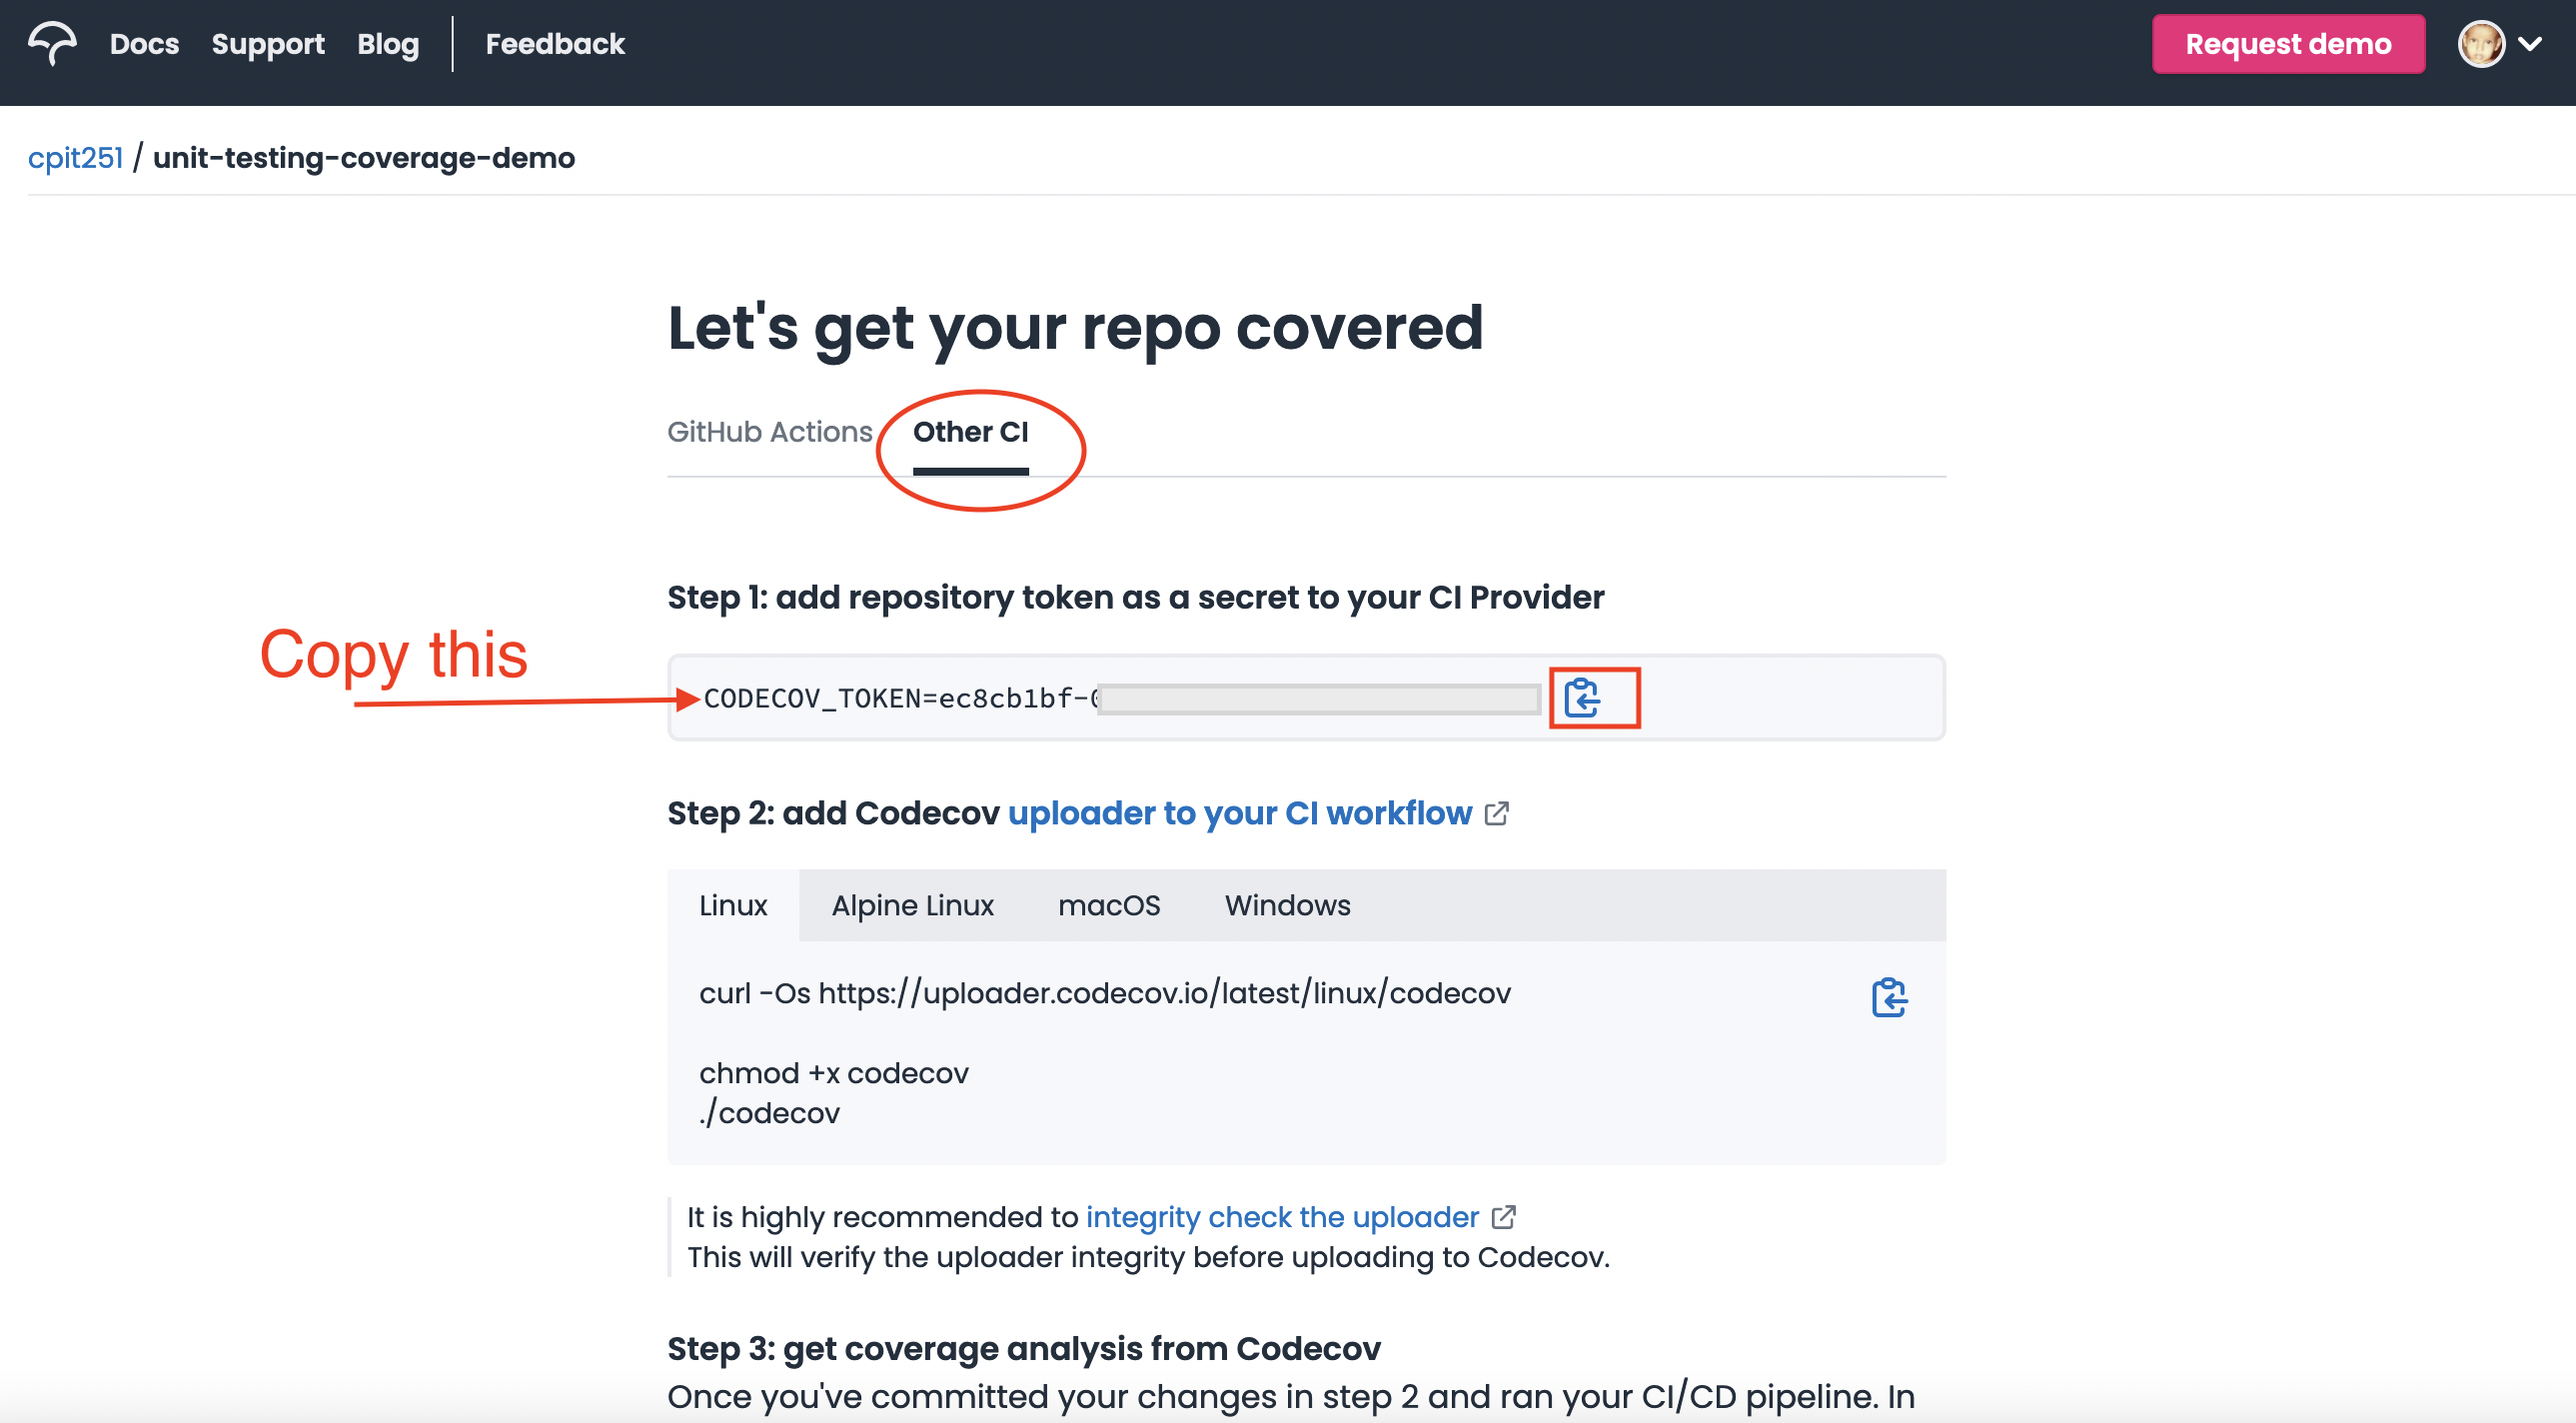
Select other CI to setup the project with CircleCI and copy the value of the environment variable CODECOV_TOKEN.
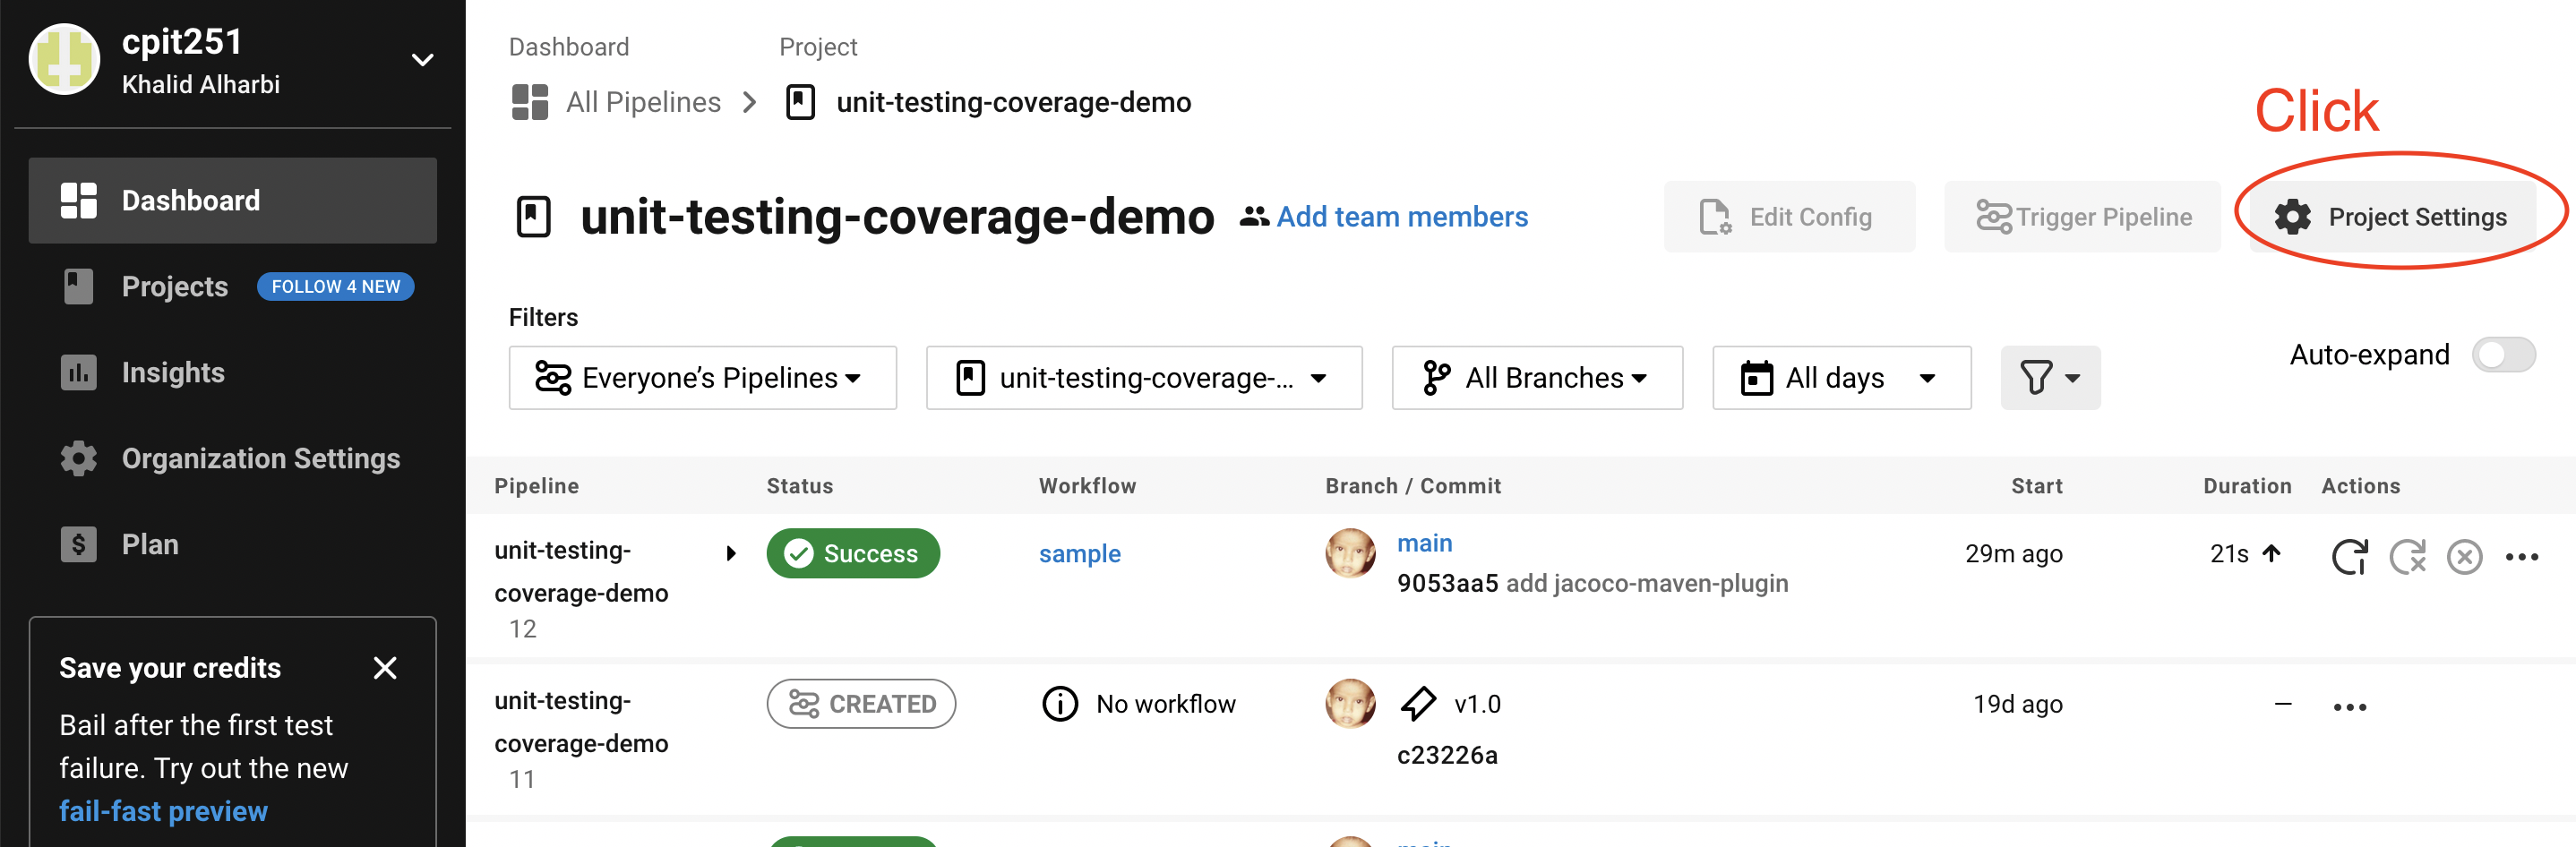
Login on CircleCI. In the dashboard, select your GitHub project.
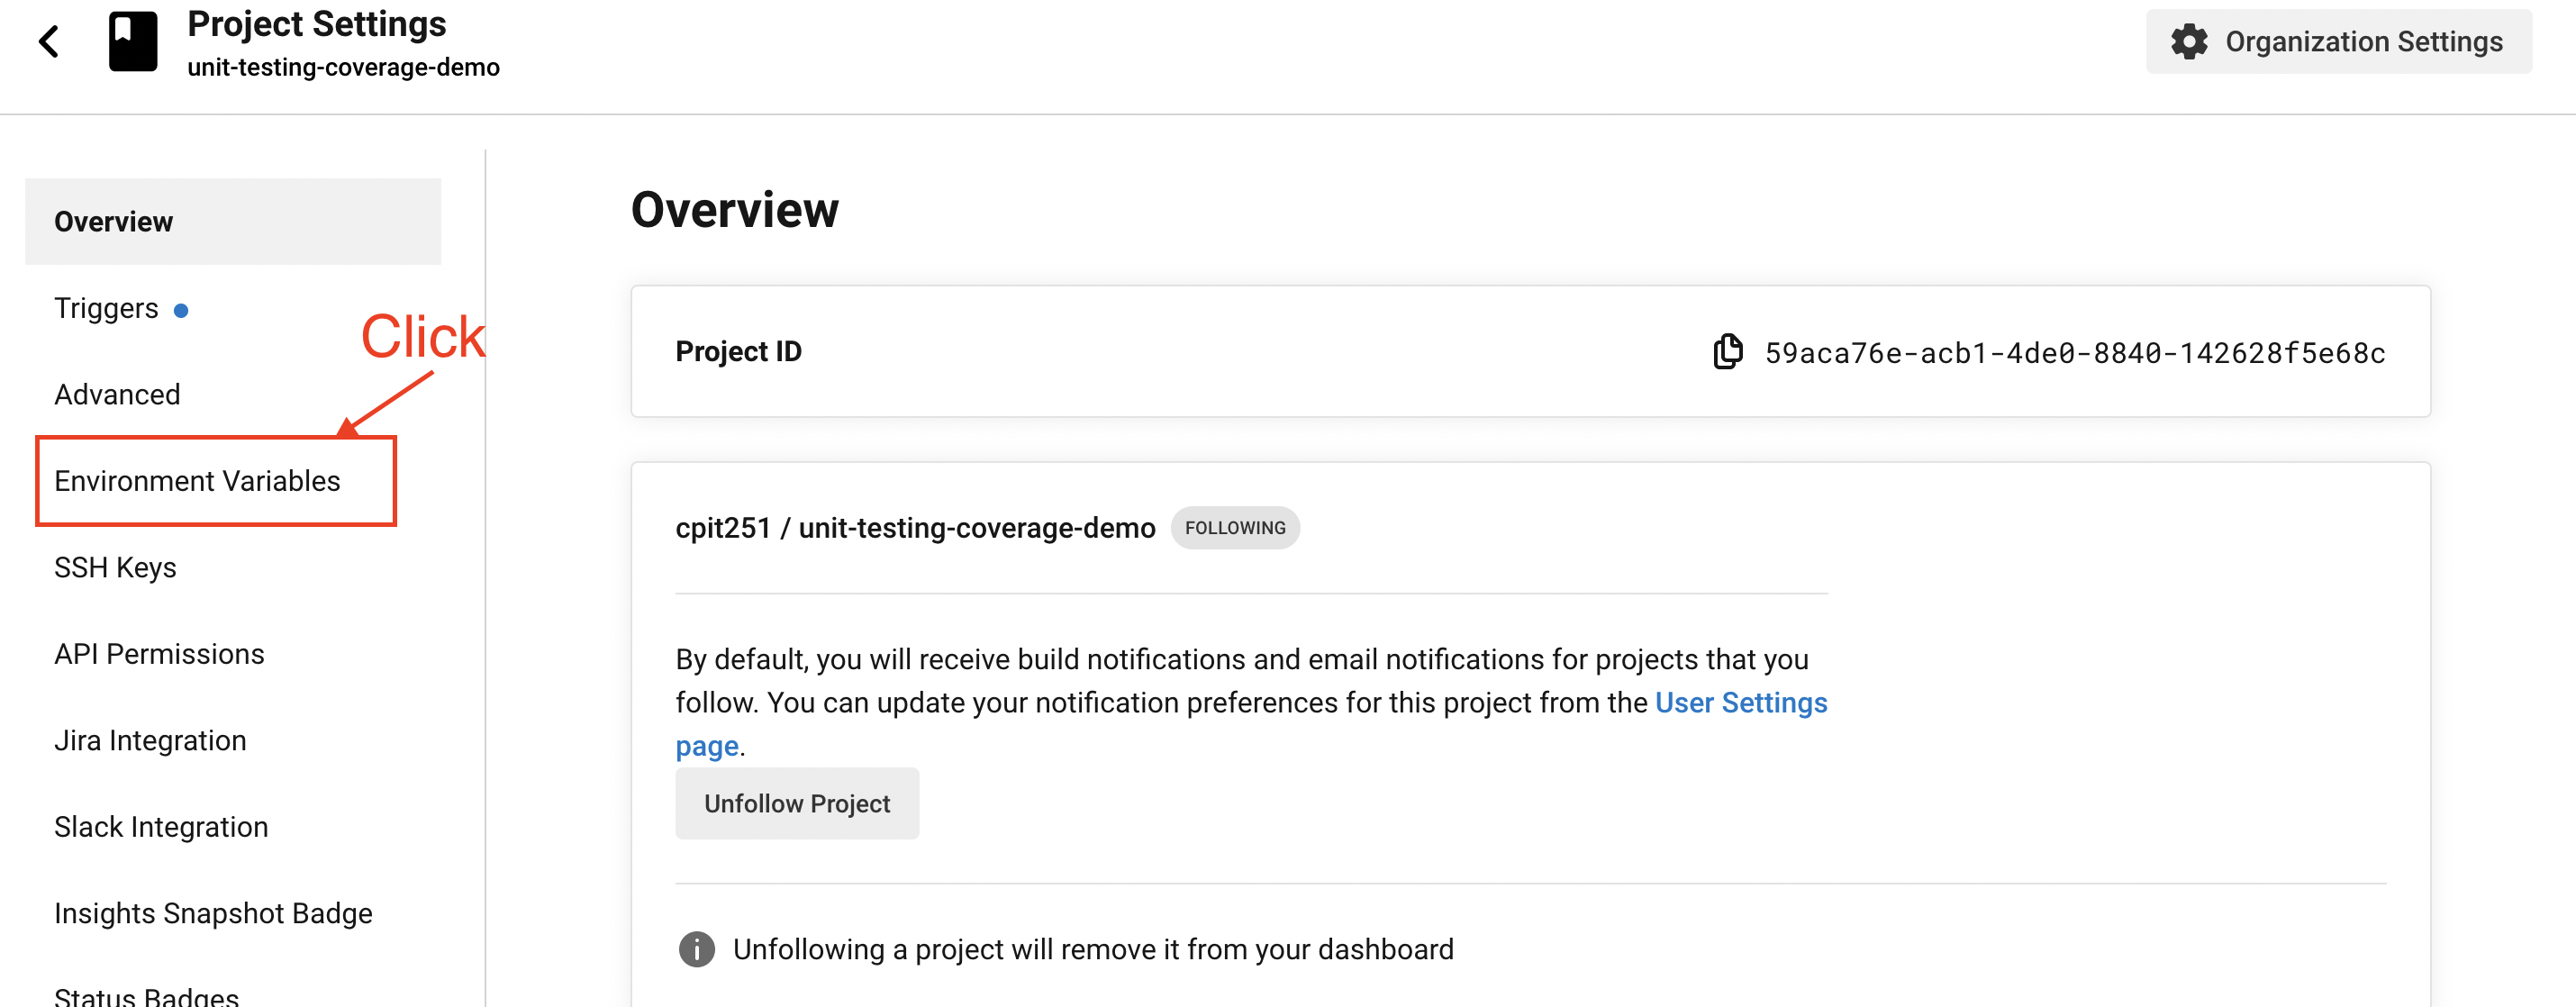
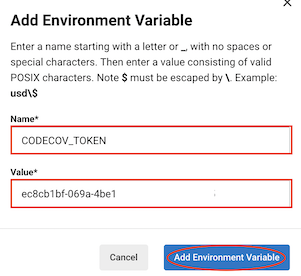
Click on Project Settings -> environment variables
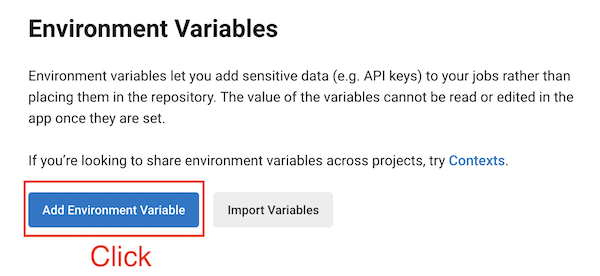
Add CodeCov’s environment variable to CircleCI.
CircleCI uses the term orb for reusable set of YAML configuration. It’s essentially a set of configuration options that can be imported in one line. We will use CodeCov orb for CircleCI.
Open the CircleCI’s config file in your IDE or editor at .circelci/config.yml and replace it with the following:
version: 2.1
orbs:
  codecov: codecov/codecov@3

jobs:
  build:
    docker:
      - image: cimg/openjdk:18.0
    steps:
      # Checkout the code as the first step.
      - checkout
      - run:
          name: Install dependencies
          command: mvn install -DskipTests=true -Dmaven.javadoc.skip=true -B -V
      # Then run your tests and collect coverage!
      - run:
          name: Run tests and collect coverage
          command: mvn -B test
      # Upload coverage to codecov.
      # CodeCov token must be stored as an environment variable in CircleCI dashboard.
      - codecov/upload

workflow:
  version: 2.1
  build-test:
    jobs:
      - build
You should be able to see the code coverage on CodeCov as shown in this link
Adding Coverage Badge
Just like the badge that we added for status of our CircleCI build and test pipeline, we can add a badge for code coverage to showcase the code coverage and quality of our project.
To add a code coverage badge, go to your CodeCov dashboard -> Settings -> Badges & Graphs and copy the Markdown code for the live badge and place it in your README.md file:
![]()
Once you add the badge to your README.md file, commit, and push to GitHub. You should see a badge like the one below:
![]()
Conclusion
You’ve learned how to create a CI pipeline using a modern CI service, CircleCI, with a version control service, GitHub, to automate the process of building and testing your project. We also explored how to generate code coverage report for your project using a code coverage service, CodeCov.
You’re expected to have unit testing, a CI pipeline, and code coverage of at least 75% in your project and all future assignments.